Transform a plain pen into a stylish accessory with a touch of creativity! DIY beaded pens are not only fun to make but also add a personal flair to your writing tools. Whether you’re crafting for yourself or as a gift, this project requires minimal supplies and offers endless design possibilities. Follow this simple guide to create a beaded pen that’s uniquely yours.
Materials You’ll Need
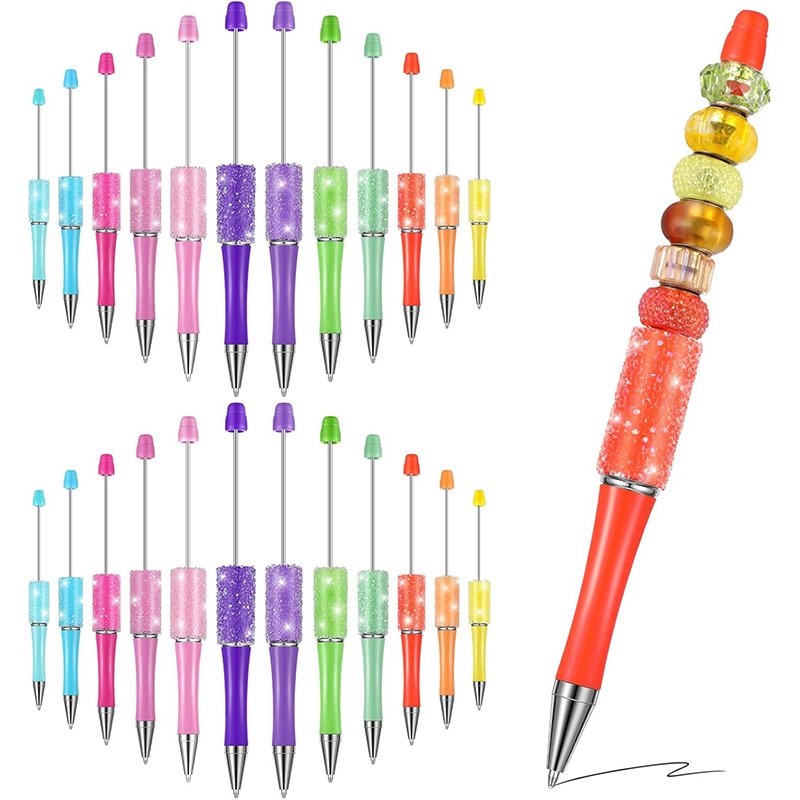
A plain pen (metal or plastic barrel works best)
Assorted beads (mix sizes, shapes, and colors for creativity)
Strong adhesive (e.g., E6000 glue or a hot glue gun)
Scissors (for trimming thread, if using)
Optional: Ribbon, charms, or decorative tape for extra flair
Step-by-Step Instructions
Prep Your Pen
Remove the pen’s ink cartridge and cap (if possible) to avoid gluing them shut. Clean the pen barrel with a damp cloth to ensure the adhesive sticks properly. Let it dry completely.
Plan Your Design
Lay out your beads on a flat surface. Experiment with patterns—alternating colors, creating stripes, or spacing larger beads with smaller ones. Consider adding a focal bead (like a charm or a uniquely shaped bead) near the pen’s top or clip.
Glue the First Bead
Apply a small dot of glue to the pen’s barrel near the base (where the ink cartridge would start). Press the first bead firmly onto the glue. Hold it in place for 10–15 seconds to secure it.
Add Beads Sequentially
Continue gluing beads one by one, working your way up the pen. For a neat finish, align each bead snugly against the previous one. If using beads with small holes, apply glue sparingly to avoid excess seeping through.
Incorporate Charms or Ribbons (Optional)
Tie a ribbon or charm near the pen’s clip or at the top for extra detail. Secure with a small dot of glue or a knot (for ribbon).
Finish the Top
For a polished look, add a final bead or charm at the pen’s tip. If the barrel is wide enough, you can also wrap decorative tape around the top for contrast.
Let It Dry
Allow the glue to cure for at least 1–2 hours before using the pen. This ensures the beads stay firmly in place.
Tips for Success
Choose the Right Glue: E6000 works well for most beads, but a hot glue gun is faster for lightweight materials. Avoid super glue, which can be brittle.
Use a Toothpick: For tiny beads, apply glue with a toothpick to prevent messiness.
Test Patterns First: Dry-arrange beads on the pen (without glue) to visualize your design before committing.
Protect Your Workspace: Lay down newspaper or a silicone mat to catch glue drips.
Variations to Try
Ombré Effect: Gradually change bead colors from dark to light (or vice versa).
Themed Pens: Use beads in school colors, holiday hues, or team spirit shades.
Eco-Friendly Option: Repurpose old jewelry beads or thrifted trinkets for a vintage vibe.
Conclusion
Creating a beaded pen is a delightful way to express your style while keeping your workspace organized. With just a few supplies and a dash of imagination, you’ll have a one-of-a-kind pen that’s as unique as you are. Happy crafting!